Investigating Fee Invoice Items
This section describes how to investigate invoice line items of the fees in the Fee Explorer page. You can view details and change the status of the fees from the line items. Changing the status of the fee is useful if your card program cannot accept it. For example, you may want to escalate a disputed fee.
The fee investigation activities that you can perform depend on your role. For more details, see Roles in Automated Back Office.
Opening the Fee Explorer Page
To open the Fee Explorer page:
-
Click the Network Fees Quick Actions button from the Automated Back Office dashboard. Or, click the
 button on the left-hand side to bring up the menu, followed by Finance > Network Fees. The Network Fees screen appears.
-
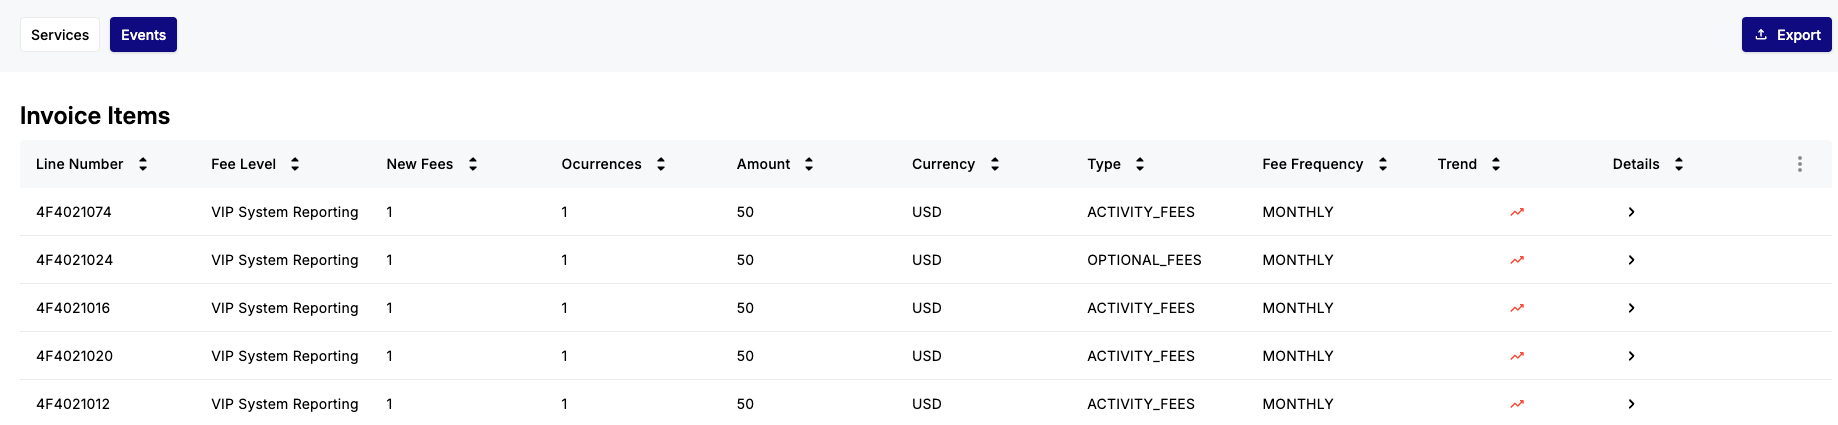
Click the Fee Explorer button. The Invoice Items list appears in the default Services view.
- Access service and event details (see the following sections on View Details on Services and View Details on Events).
Viewing Details on Services
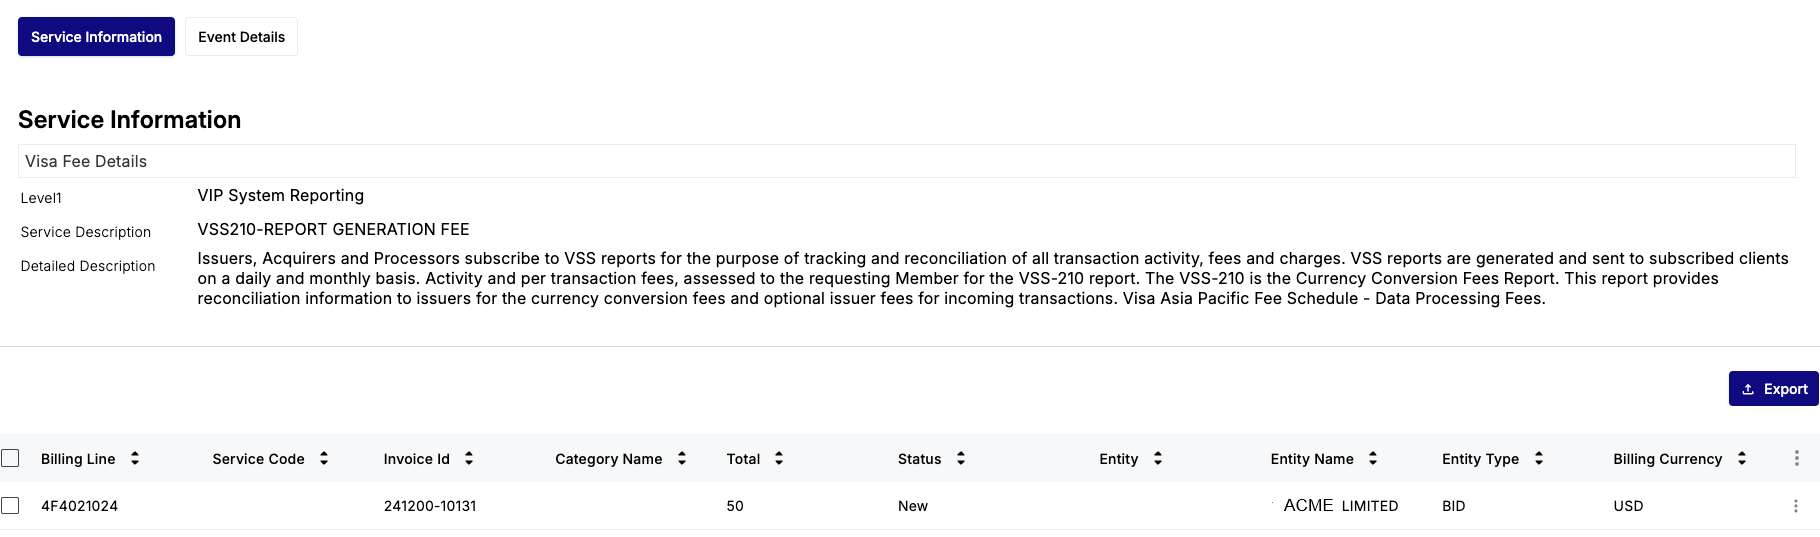
You can find out information on the services of individual fees by drilling down into the invoice entries in Fee Explorer. The service information section includes background details of the fees that are required by the Card Scheme.
- From the default Services View, click the arrow
 button in the Events column from the Invoice Item list.
 - Click the arrow button in the Details column from the Invoice Item list. The following shows an example of the VIP System Reporting fee, where the information appears in the Service Information tab.
View Details on Events
You can find out more details on the events that, when triggered, result in fees being passed to the Card Scheme. This include details such as the associated event code, where the report is sent when the event is triggered, and details of rates.
- If you are in the Service Information tab, click the Event Details tab, Details on the event appears.
- If you are in the default Services view, perform the following steps:
- Click the arrow button in the Events column from the Invoice Item list.
- Click the arrow button in the Details column from the Invoice Item list.
- Click the Event Details tab. Details similar to the following are displayed:
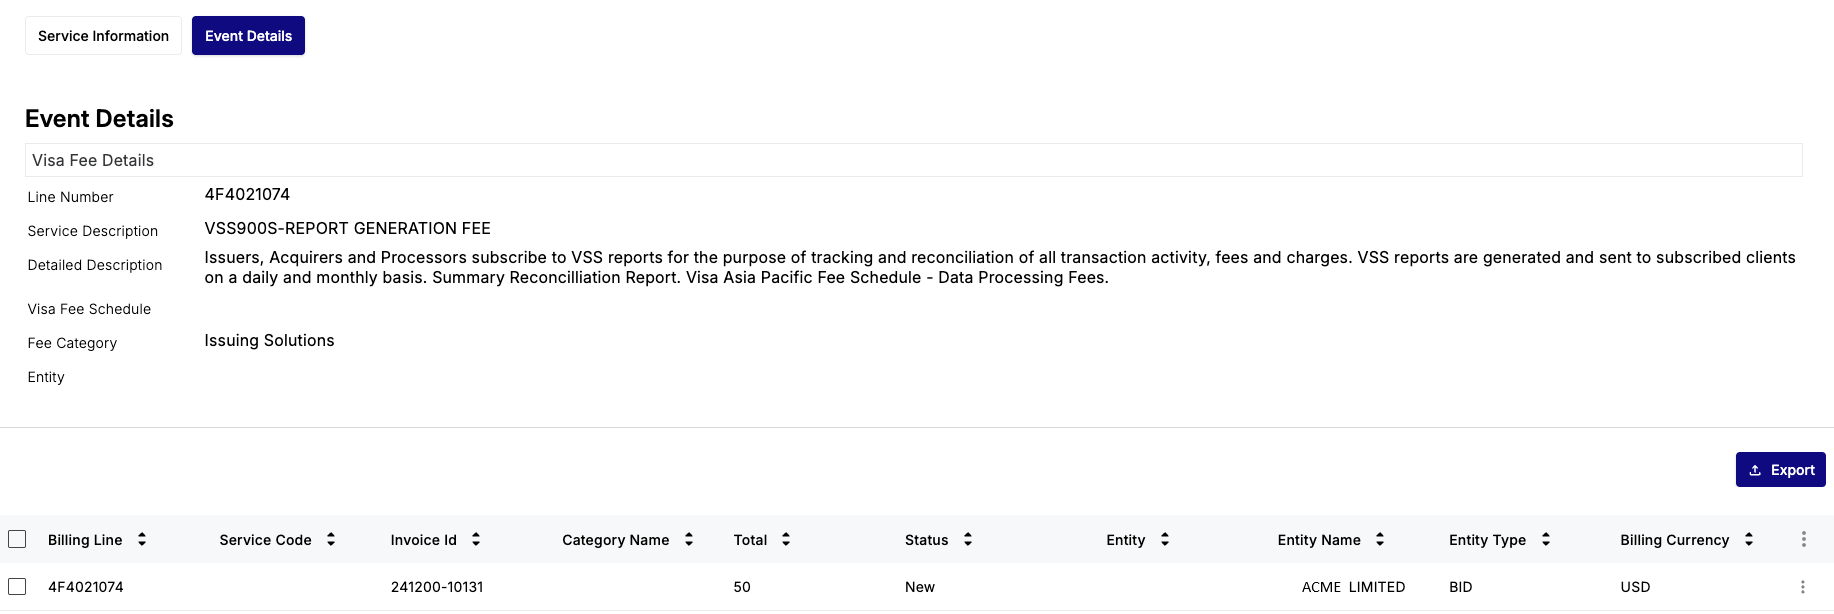
For more information on the individual events, see Appendix 2: Event Details.
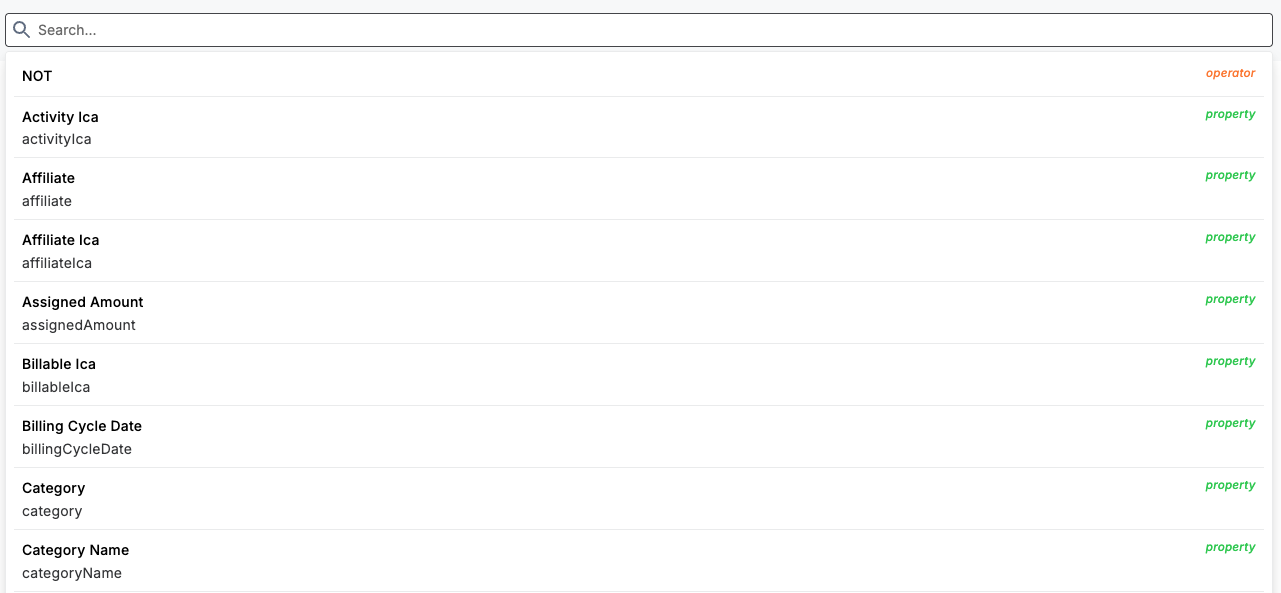
Searching for an Invoice Item
You can enter a search term in the search box. Or you can click on the search box and use the various properties that appear in a drop-down list.
Filtering Records
You can use filter options to refine the list of records. These include Extracted Bin/Invoice ICA, Entity id, Category Name, Service Code, Fee Category, Currency and Status filter options. These filter options appear by default, however, you can also filter by other options based on your requirements.
If you are using the Visa, you can also filter by Extracted Bin and Entity Id. While for Mastercard, you can use Invoice ICA and Affiliate Id as filters.
Choosing the Default Filter Options
To choose the default filter options:
-
Click the Filter button. Drop-down lists appear for all the filters.
-
Select individual filter options from the following drop-down lists:
-
Extracted Bin: All / Invoice ICA: All
-
Entity Id: All / Affiliate Id: All
-
Category Name: All
-
Service Code: All
-
Fee Category: All
-
To clear any of the created filters, click Clear all.
Filtering by Extracted Bin / Invoice ICA
To filter by Extracted Bin/Invoice ICA:
-
Click the drop-down.
-
Select a number from the OPTIONS list of the search.
Filtering by Entity Id / Affiliate Id
To filter by Entity Id/Affiliate Id:
-
Click the drop-down.
-
Select a number from the OPTIONS list, or use the search.
Filtering by Category Name
To filter by category name:
-
Click the Entity Id: All drop-down.
-
Select any of the following categories from the OPTIONS list:
-
ACTIVITY_FEES
-
ADJUSTMENT_FEES
Filtering by Service Code
To filter by Service Code:
-
Click the Service Code drop-down.
-
Select any of the Service Code categories. See Appendix 1: Service Codes.
Filtering by Fee Category
To filter by Fee Category:
-
Click the Fee Category: All drop-down.
-
Select any of the following fee categories or use the search:
-
Transactional — fees related to day-to-day transaction processing activities.
-
Reporting — fees related to Card Scheme reporting
-
System & Tools — fees related to Card Scheme systems and tools
-
Other — fees not included in other categories
-
Cards & Accounts — fees related to your cards and accounts
-
Fines & Penalties — fines due to non-compliance with Card Scheme rules
-
Filtering by Currency
To filter by currency:
-
Click the Currency: All drop-down.
-
Select a three-digit currency code from the OPTIONS list, or use the search.
Filtering by Status
To filter by status:
-
Click the Fee Category: All drop-down.
-
Select any of the following fee categories or use the search:
-
Accepted — fee has been viewed and accepted.
-
Investigated — fee has been flagged for further internal investigation.
-
Escalated — unknown fee or query regarding the fee, which needs to be escalated.
-
New — new fee invoice received. This status is set for all new fees received on the system.
-
Optional — fee is categorised as Optional.
-
Penalty — fee is classified as a Penalty.
-
Choosing Further Filter Options
To select further filter options:
-
Click the Filter button. The gears icon appears with the other filter options.
-
Click the gears icon.
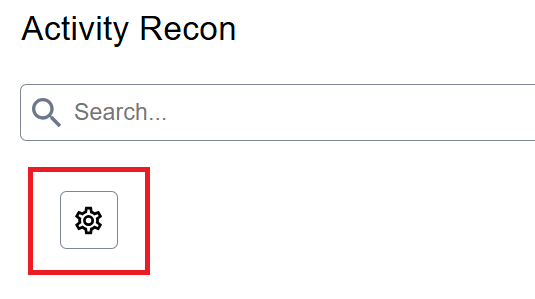
-
Select any of the filter option categories.
Changing the Status of a Fee
You can change the status of a fee record from the default fee status of New Fees. The status that you can set depends on the current fee status. For example. you can only apply the status of Reopen to a fee in the Accept or the Investigate status. The following are the statuses that you can set:
-
Investigate — flag a fee for further investigation with your internal teams (for example. Finance, Operations, Compliance).
-
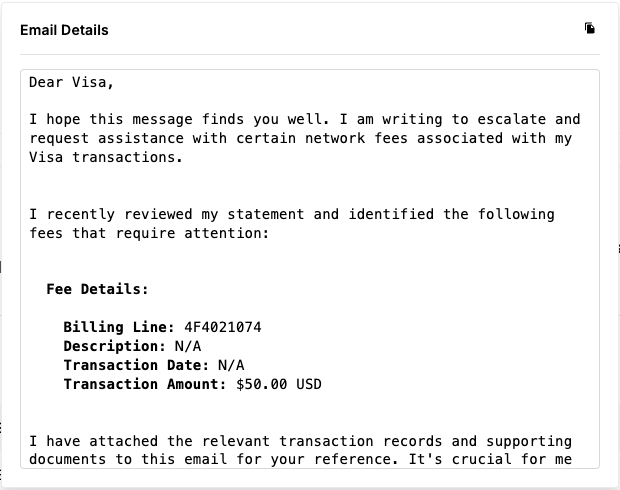
Escalate — flag a fee for escalation. The system prepares an email template with details, which you can copy and send to the Card Scheme.
-
Accept — approve a fee that has either been reviewed, or that is in the status of New Fees. When approved, the fee will no longer have the Warnings, the New Fees or the Exception status.
-
Reopen — for any fee that was flagged as Accept, this status allows you to reopen a fee. For example, you may want to reopen a fee that you have accepted in error. When reopened, you can alter the status of the fee.
When you update the status of a fee, it changes for the Thredd Automated Back Office portal only.
If a fee has marked as Suspicious in the Exception category, you can Escalate or Investigate it but you cannot Accept it.
To change the status of one or more fee items, you need to be in the Events view.
-
For an invoice item, click the arrow
button in the Details column. -
Select one or more rows.
-
Click the three-dots next to the line item and choose a status from the pop-up list. For example, you can select the status of Escalate for a fee in the status of New.

This status changes for the item.
Send an Escalation Email
- Identify a billing line with the status of Escalated. The following shows an example.

- Click the email icon. An email template similar to the following appears.