Managing Access to PAN Finder
For using the PAN Finder feature, a user needs to have been assigned the Sensitive Information Manager role. A user can be assigned the Sensitive Information Manager role provided that they have met the eligibility requirements.
For a user that no longer requires access to PAN Finder, you can remove the Sensitive Information Manager role for them. Removing access allows the user to continue to use Thredd Portal for any other role that they may have been assigned to.
Steps for Setting Up PAN Finder
Setting up PAN Finder involves the following steps. For assigning the Sensitive Information Manager role, the option that you choose depends on whether or not your organisation has migrated to the IAM platform.
-
You raise a ticket with Thredd's Customer Support team through the following link: https://thredd.atlassian.net/jira/servicedesk/projects/CSTHREDD/.
-
Thredd checks that the user is PCI DSS-compliant in order for them to be eligible for the Sensitive Information Manager role.
-
Thredd notifies you that the user is eligible for the Sensitive Information Manager role through the raised ticket. You will also be notified if the request has been declined.
-
Thredd or the Admin User assigns the Sensitive Information Manager role to each eligible user.
-
If the organisation has migrated to IAM, an Admin User can assign the role to the users through Thredd Portal. For more details, see the following procedure on Adding the Sensitive Information Manager role.
-
If the organisation has not migrated to IAM, Thredd assigns the Sensitive Information Manager role to the users on the Admin User's behalf. When assigned, the PAN Finder user can start operating PAN Finder (see Using PAN Finder).
-
If your organisation intends to start migrating to IAM, contact your Thredd Account Manager.
For details on migrating to IAM, refer to the Thredd Identify and Access Management Migration Guide.
Adding the Sensitive Information Manager Role
You can add the Sensitive Information Manager role to a new or an existing eligible user in Thredd Portal.
Adding the Role to a New User
You can add the Sensitive Information Manager role when you create the new user for the organisation in Thredd Portal. When you have added the role, you then need to activate the user.
- Sign in to Thredd Portal.
-
Go to System Admin > Organisation > User Management. The User Management page displays.
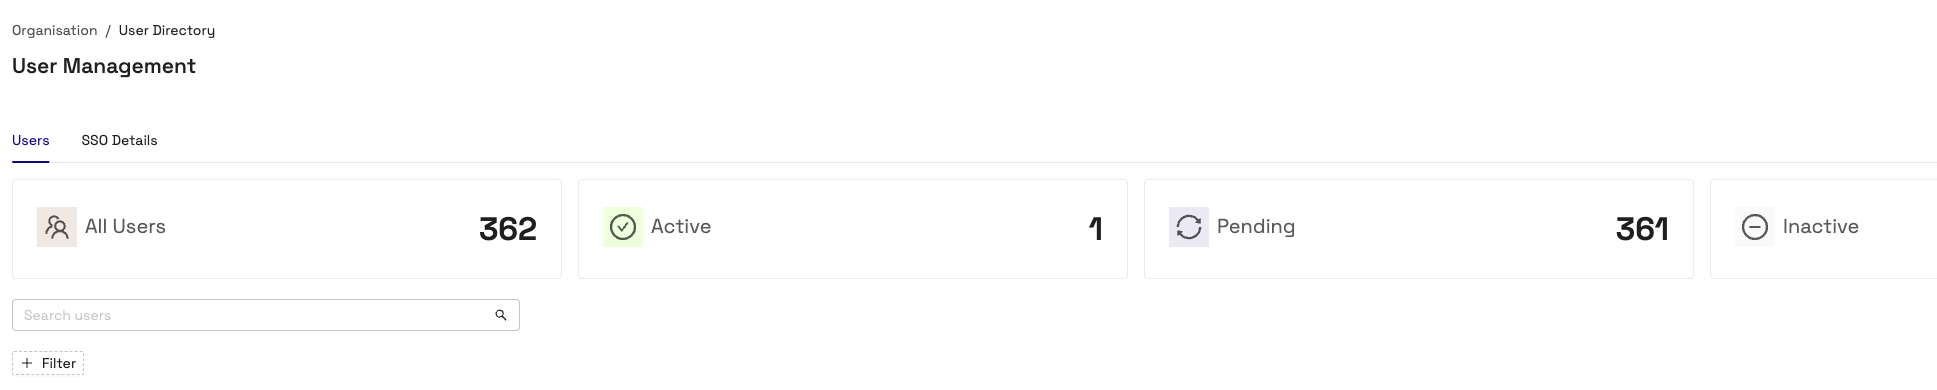
- Click Add New Users The Add New Users page displays.
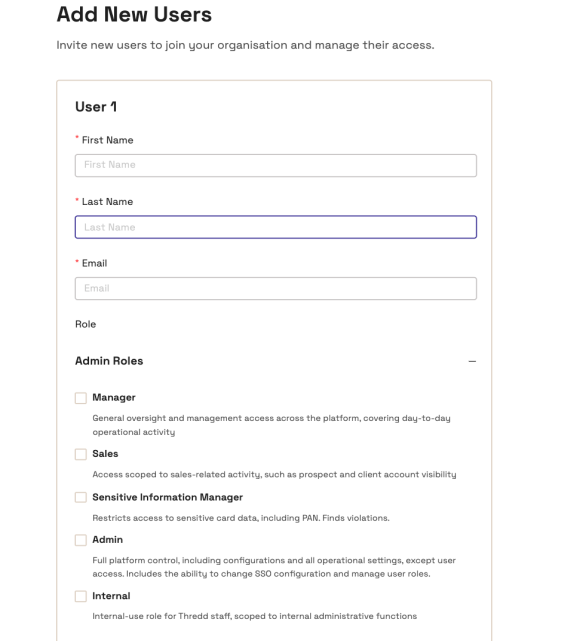
- Enter basic details of the user:
-
Enter the user's first name in the First Name field.
-
Type in the user's last name in the Last Name field.
-
Enter the user's email address in the Email field.
Filling in data to all three fields are mandatory.
-
Under Admin Roles, select Sensitive Information Manager as shown in the following example:
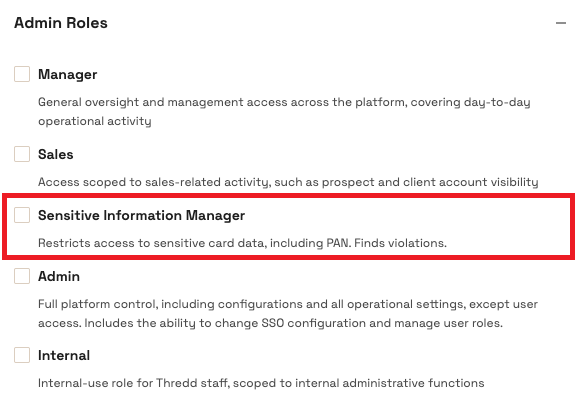
- If required, choose any of the other roles under Admin Roles, Developer Roles, Card & Transactions Roles and Read-Only Roles.
- Click Save and Continue.
-
In the Review and Finish page, check the entered details of the new user, including their assigned role of the Sensitive Information Manager.
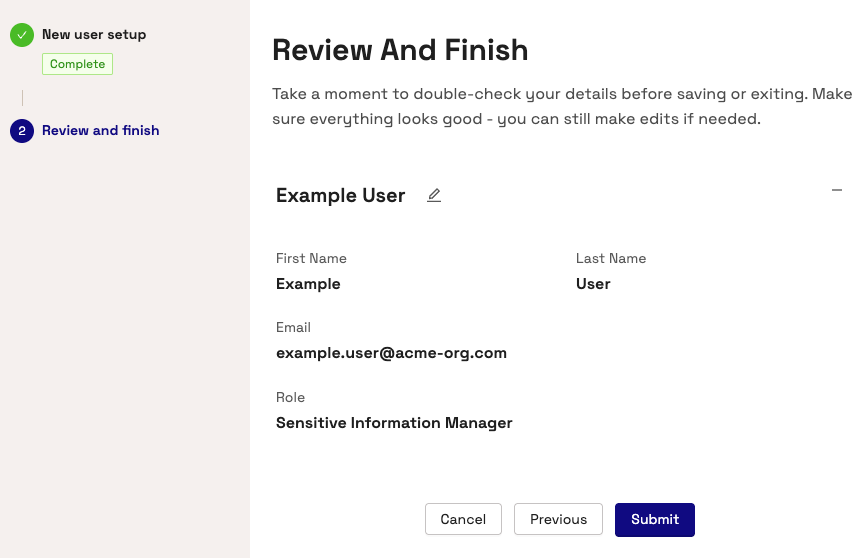
- Click Submit. A message appears indicating that the user has been created.
- Activate the user:
- Find the newly-added user in the User Management page.
- Click the options menu icon in the Actions column.
- Select the Activate option.
When activated, the user receives an email. A notification appears confirming that the user has been activated.
The user needs to accept the activation of the user account from the received email. If they did not receive the email, click the options menu icon in the Actions column and select the Resend Email option.
Adding the Role to an Existing User
You can add the Sensitive Information Manager role to a user that has already been added with a different Thredd Portal role. For example, they already have been assigned the Manager and the Internal roles.
-
Ensure that you are on the User Management page.
-
Find a user that you want to update, such as in the following example.

-
Click the options menu icon in the Actions column.
-
Select Edit User from the options menu.
-
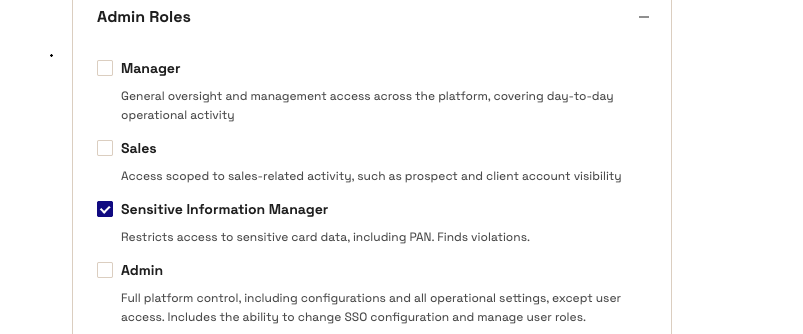
In the Edit User page, select Sensitive Information Manager under the Admin Roles section.
-
Click Save and Continue.
-
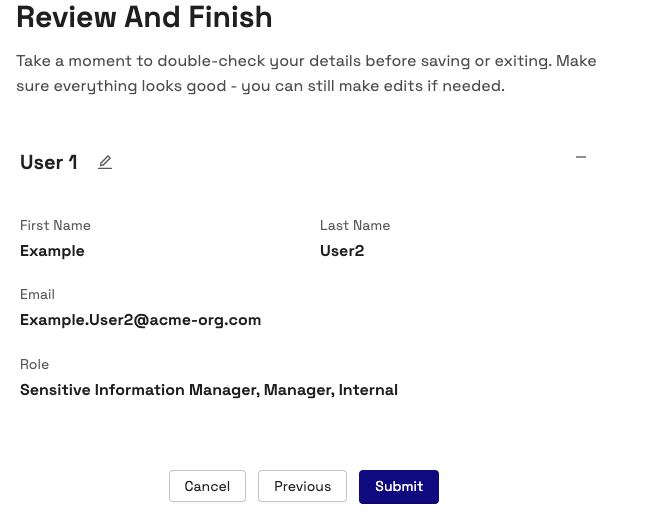
Review the updated details which may appear similar to the following.
-
To confirm the change, click Submit.
Removing PAN Finder Access for a User
From the Edit User page, you can remove the Sensitive Information Manager role if required.
- For an existing user, clear the Sensitive Information Manager check box in the Admin Roles section of the Edit User page.
- Click Save and continue.
- Review the details on the page.
- To confirm the change, click Submit.