Creating an Application and OAuth Client
Before you can access Thredd's REST API, you must create an application and an OAuth Client in Thredd Portal to register it and receive a Client ID.
Once you have created an application and OAuth Client, you can request client credentials, and configure your application and a REST interface (such as Postman) to provide credentials when making API calls. Think of the Client ID as the passport for your OAuth Client, and therefore your application. Combined with the credentials you need for your chosen Client Authentication method, it allows Thredd to verify your identity and grant access.
Summary of the steps
The steps for creating a new application and OAuth Client are as follows:
- Log in to Thredd Portal.
- Create a new client application, adding a name and description.
- Create a new OAuth Client for the application.
The PMid is automatically added to your OAuth Client if you only have one PM. If you have multiple PMids, then you can assign the PMid in Thredd Portal.
Prerequisites
-
You must have access to Thredd Portal.
-
You must be an Admin for your organisation.
-
You must have installed OpenSSL on the machine (the Server) that will make requests to Thredd platform (the Client).
Step 1: Log in to Thredd Portal
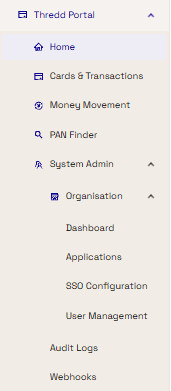
Log in to Thredd Portal and select System Admin. In System Admin menu, select Organisation, then Applications.
Step 2: Create a new client application
The Applications screen lists any applications that are registered in Thredd Portal.
If an existing application is already present (and you do not need to create a new one), then check whether an OAuth Client already exists for it. Select the Actions menu and select Review Application. Check the OAuth Clients screen; if an OAuth Client is not present, see step 3.
To create a new application:
-
Select the Add Application button.
-
The Create New Application screen appears. Enter the basic information, such as a name and description, for the application.
Thredd recommends that you use an application name that you can easily identify for any application management activities. For example, to distinguish it from other applications when you need to obtain credentials, such as a Client ID, access token or certificate.
-
Select Next and review the new application summary; select Back to make changes or select Create Application to save it.
-
Your new application now appears in the Applications screen. Select the menu (three dots) under Actions and select Review Application. The application summary opens on the OAuth Clients tab by default. See Step 3. Create a new OAuth Client.
Step 3: Create a new OAuth Client
The application details has one tab; OAuth Clients. MTLS users will have an additional Certificates tab. The steps to create an OAuth Client are as follows:
- In the OAuth Clients tab, select Create Client.
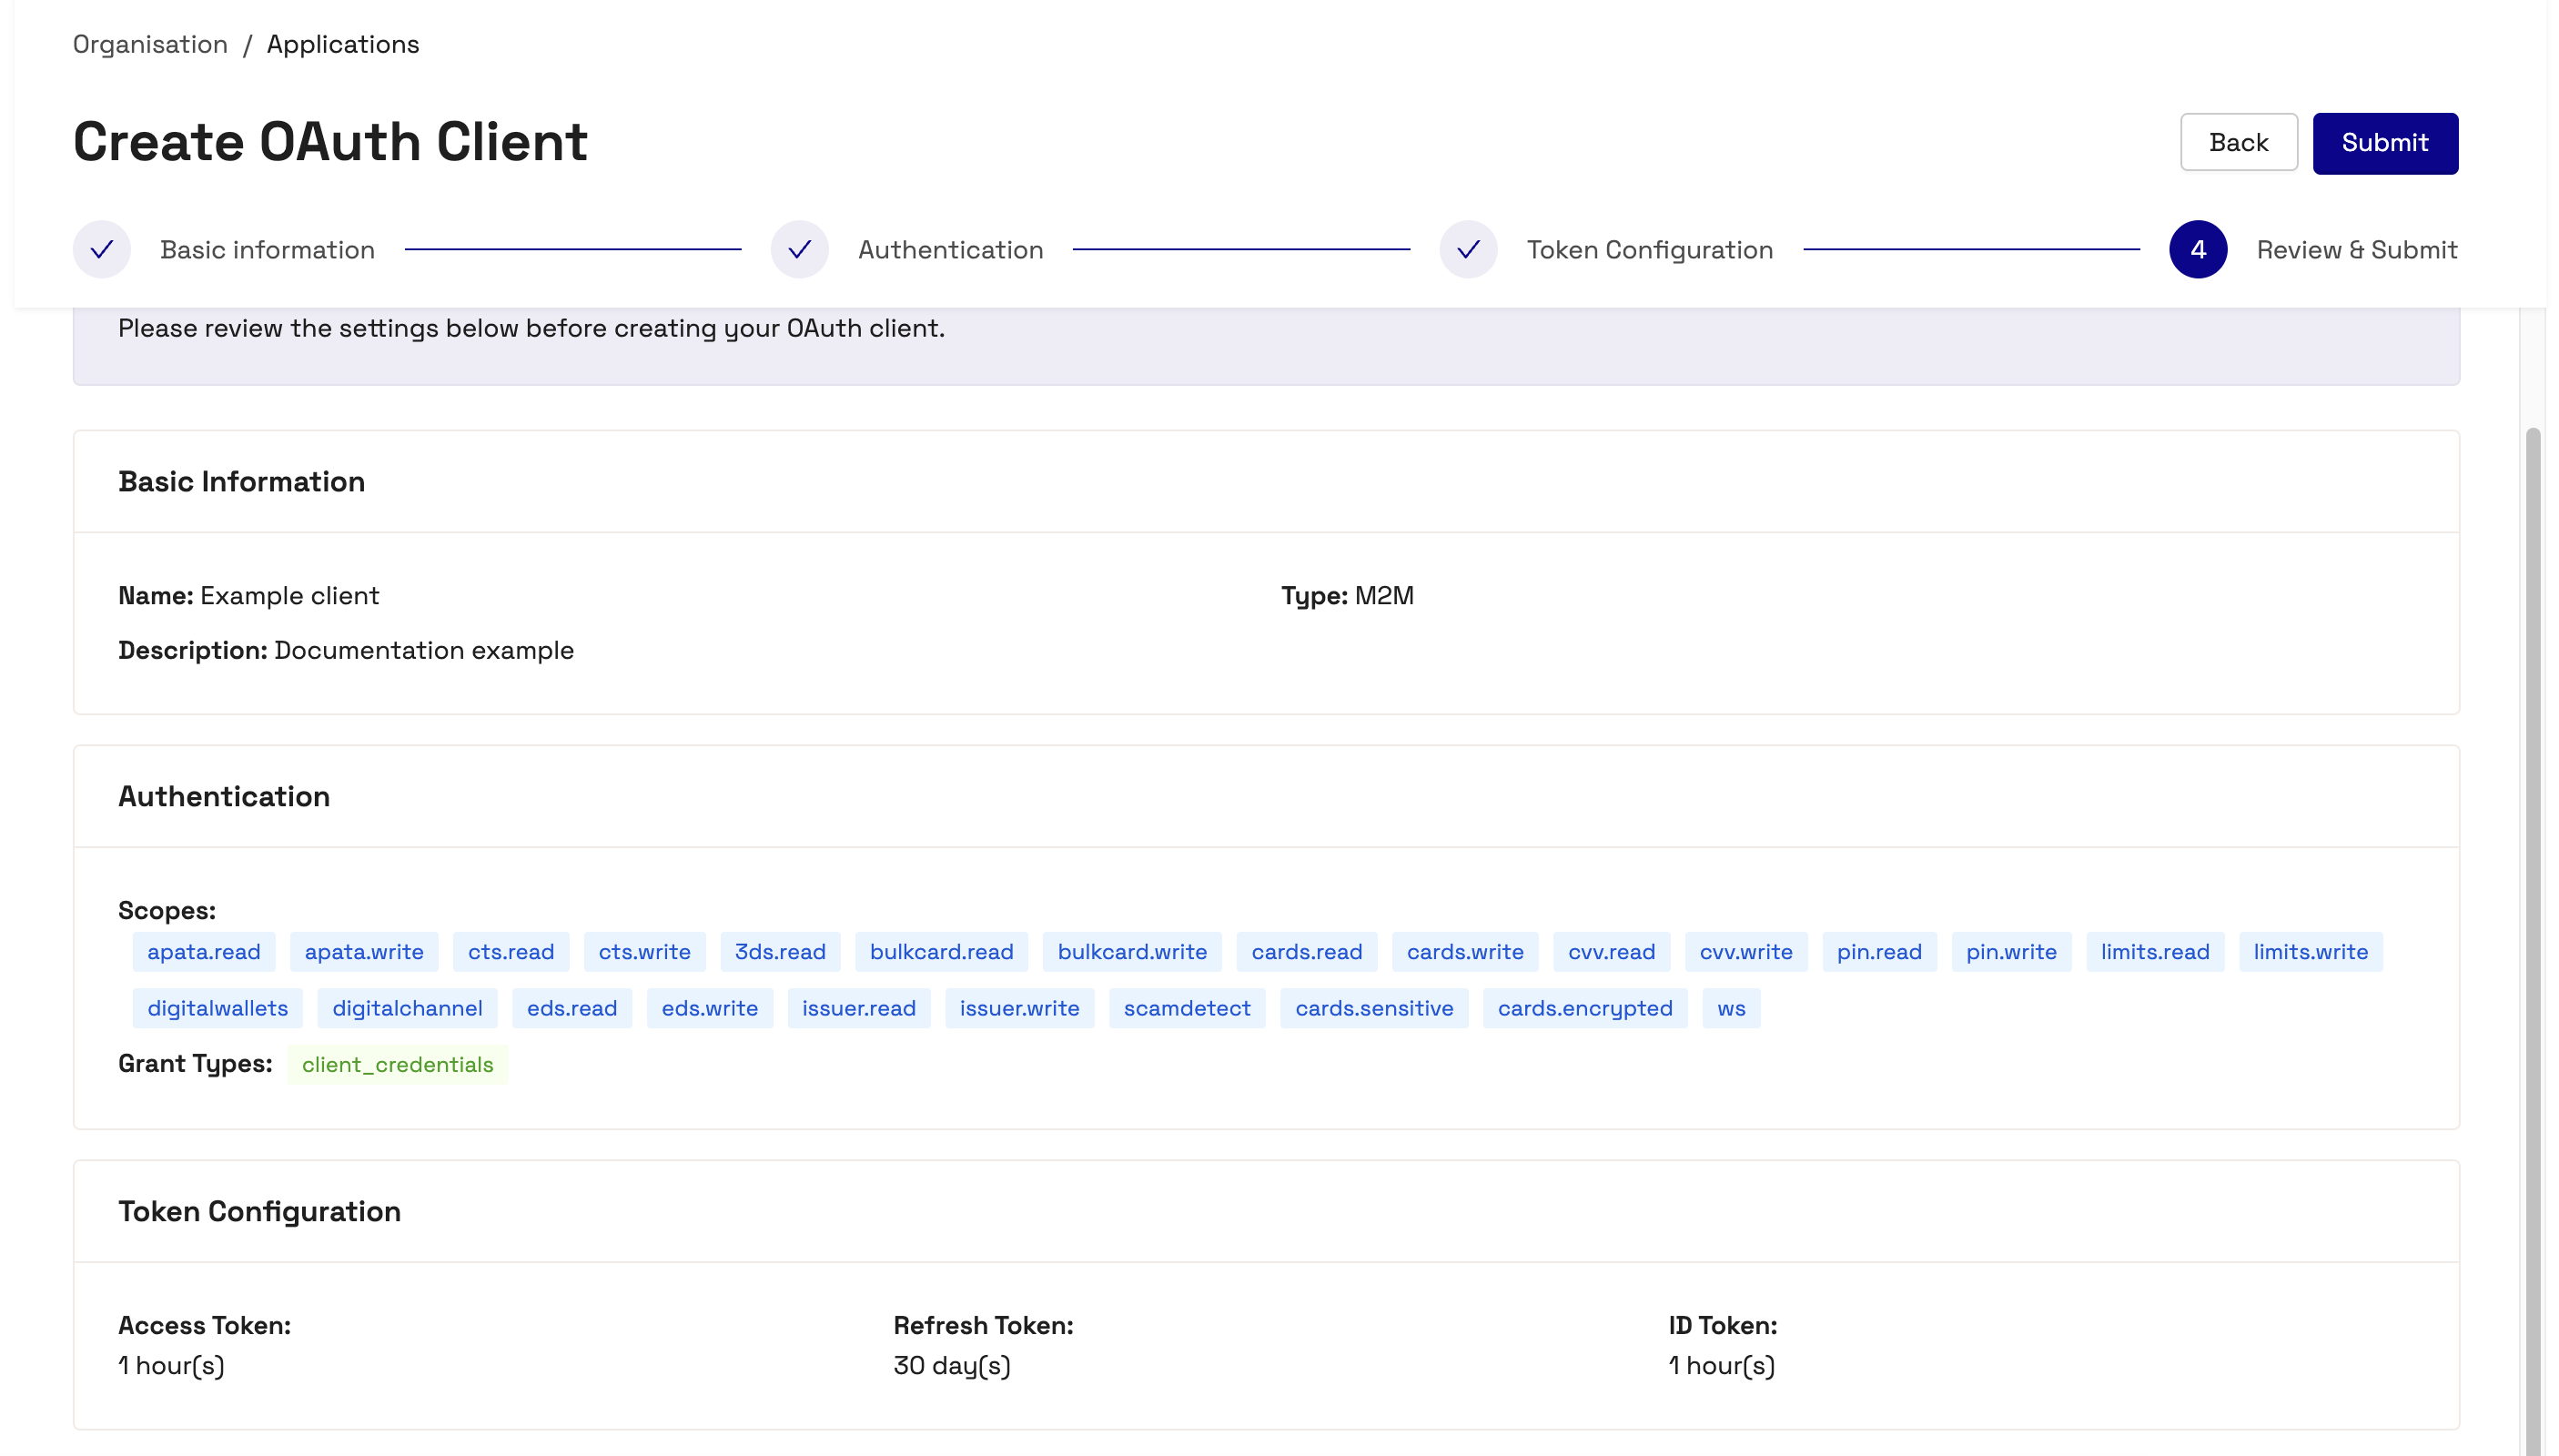
- The Create OAuth Client screen appears, starting with the Basic information stage. Enter the basic information, such as the Client Name and Description. Select Next.
- The Authentication stage summarises the recommended Security Configuration. To continue, select Next. To change the information, select Back.
- Optional, if you have more than one PMID, select the required PMID. Users with only one PMID will have it auto-selected.
- The Review stage allows you to review your configuration, based on the information that you entered in Basic Information, Authentication, and Token Configuration. You can view the list of available Scopes for your application in the Authentication section. To proceed, select Submit; to make changes select Back and then submit the details to finish creating the OAuth Client.
You have now registered a new OAuth Client, with a unique Client ID for your application. You can view it in the OAuth Clients screen of your application's details in Thredd Portal.
Next steps
You must make sure that you request and provide the necessary credentials from Thredd to access Thredd's REST APIs.
If you are using an mTLS connection, your application must also present a Transport Certificate from Thredd. Thredd adopts a self-service approach, which allows an Admin user to independently request and manage certificates via Thredd Portal.